


Step 3: Type a text (Font: Arial; Size:72)
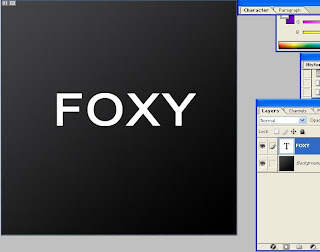
layer (layer3).

..and the picture should look like this: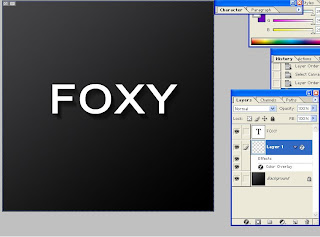
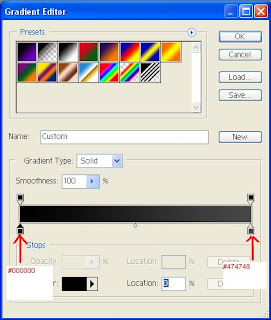
Step 6: Right click on Layer FOXY ->Blending options ->Gradient Overlay:
 ...Select Angle: -24
 And the picture should look like this:
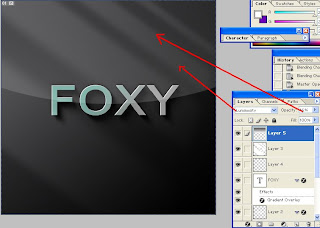
Step 7: click the "FOXY" layer then press crtl + c -> ctrl +v. Now, you have a new layer. Ctrl+click the layer created( will select the text). now press space+down arrow and right arrow . after that press delete and the picture should be like this: 
Step 8: Create a new layer (ctrl+shift+n) and select the square brushes.
Select the color white and the size of brush from 39 px.(first ray) ->7 px.7->114->120(last ray) and draw 4 lines :
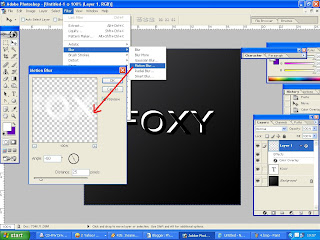
 Step 9 : go to filter-> blur->gaussian blur adjust radius to 8.6 pixels.
 Step 10 : now click on rectangular marquee tool and right click on the image ->free transform and resize and rotate the image. Then adjust the perspective to look like this :
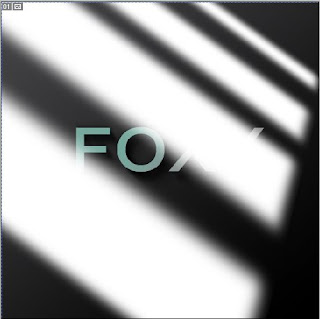
Step 11: Now set the layer to Overlay and 20% opacity of the layer with the rays.
 Step 12: Select the background layer, then select elliptical marquee tool and make a selection like in the next picture. Press ctrl+c->ctrl+v and drag the new created layer to the top of the layers.
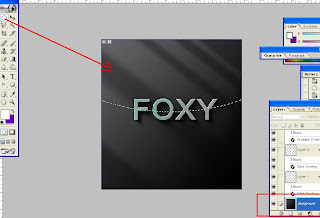
FINAL IMAGE:

ENJOY IT :)

0 Response to "Light Vision Text"
Trimiteți un comentariu