


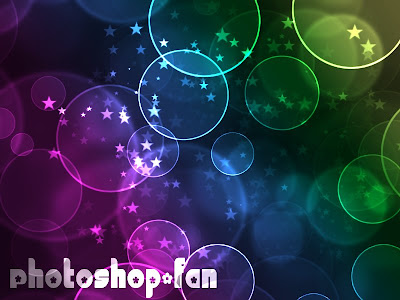
With this tutorial we will learn to create a colored bubbles effect. We will create a cool background using the Brushe and the Gradient Tool. You can do different mixes with your favorite colors and the result is an explosion of color and energy.
Step 1: Create a new document in Adobe Photoshop(800x600px.)
Step 2: Fill the background with color #242424.
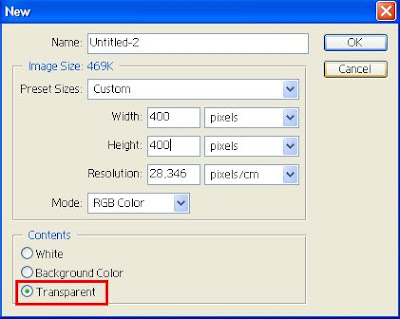
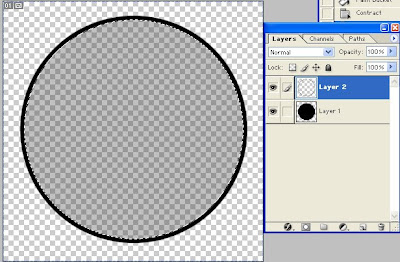
Step 3: Now we will have to create a brush as in the previous tutorial. So create a new document (file >new) and use the resolution 400 x 400 px. And don't forget to set the transparent content(Pic. 1). Next up, create a new layer and select the Elliptical Marquee Tool and draw a circle then fill it with black. After that create a new layer and fill again the selection with black. Now we gonna make the border going to select>modify>contract> 6 px. And now define the brush going to edit>define brush.(But before deselect any selection!!).
Step 4: Create a new layer and fill it with the gradient tool (the colors I used are: #6F156C, #2E64B6,#00601B, #E4E072) and change the Layer Blend Mode to overlay.
 Step 5: Now create a folder and change the blend mode to color dodge.
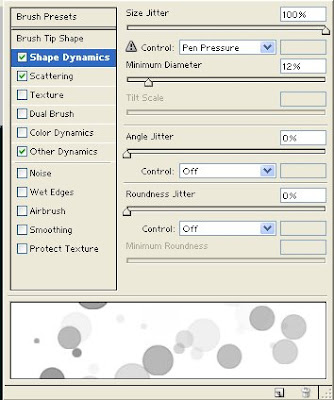
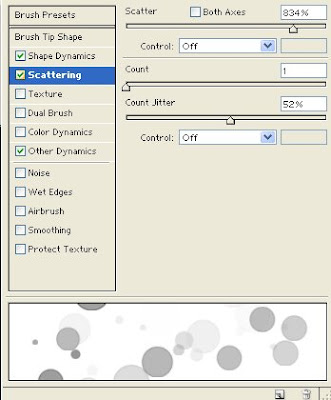
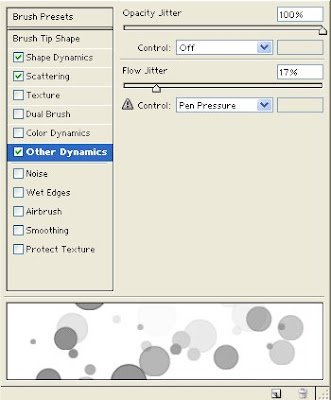
Step 6: Create a new layer and select the new created brush and press F5 to enter the brush engine. Now follow the next settings and then select the white color and paint with the new brush some circle.
Step 7: Now go to Filter> Gaussian Blur>7.9 px. radius.
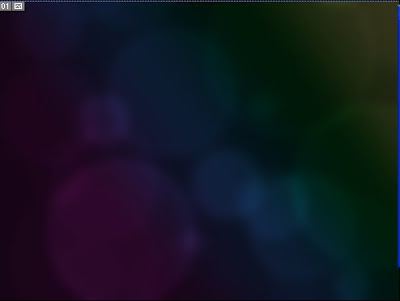
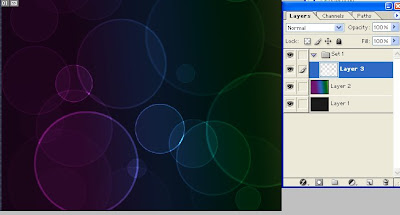
Step 8: Create a new layer and paint again some circle and go to filter>blur>gaussian blur> 4 px.
Step 9 : Create a third layer and again paint some circle.
Step 10: In a new layer you can add some stars.

0 Response to "Bubbles Background"
Trimiteți un comentariu