


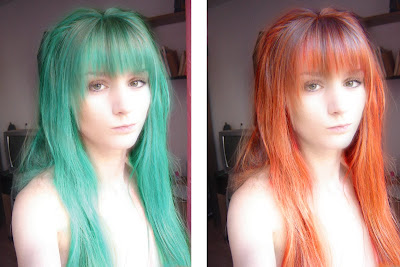
Have you ever thought how you will look with your hair blue/pink/green? Now you can find out how to make this change in just 8 Steps in Adobe Photoshop.
Tips: This Photoshop tutorial is proper for light hair color. To obtain different colors, what you have to do is playing with the values of hue/saturation command
Step 1: Open the photo.
Step 2: Select pen tool and select the hair.
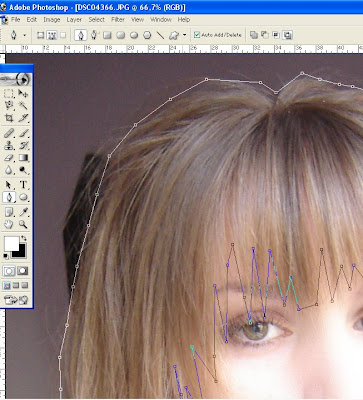 Step 3: Select Convert Point Tool and modify the corners.
Step 4: To make a selection Right click on photo> Make selection.
To modify the Feather of the selection select Rectangular Marquee Tool then right click on image and select Feather>5 px. (My photo has 1600x2300 px.; adjust the feather value proportional with the dimensions of your photo).
Step 5: Press ctrl+c ->ctrl+v to copy the selected area.
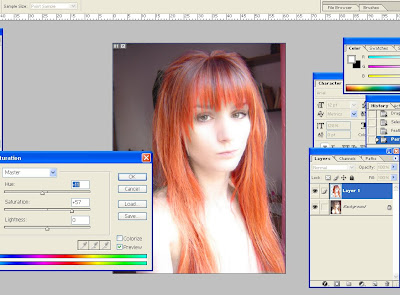
Step 6: Select the new layer; go to image-> adjustments>hue/saturation and play with the values.
Step 7: Select the Brush (30 px) to soft light mode and 20 % opacity and retouch the areas. The same thing you should do with the Eraser Tool with a low opacity (round about 14-30 %) (ALL THE MODIFIES ARE ONLY ON THE LAYER 1!!), then you can use the Dodge Tool/Burn Tool to retouch the light/shadow areas.
Step 8: Ctrl+c on the Layer 1 then go to select>inverse; then go to select>modify>expand and give 2 px. For a soft effect select Filter>Blur>Gaussian Blur and set to 8,6 px.
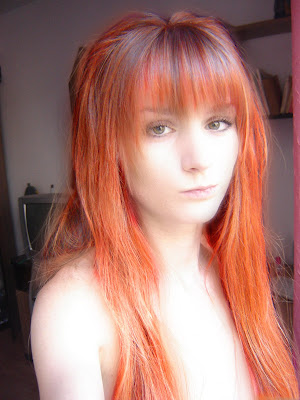
Final Photo:

0 Response to "Change your hair color."
Trimiteți un comentariu